Banner

Thursday 15 May 2014

How to dim everything on desktop except the active window?


Dim everything on computer screen except the active on which you are currently working.


The First Question in mind is Why to do so..??

  • This is helpful for better focus of the only things on which we are working.
  • This is also Battery efficient for laptops. By dimming the unwanted part of the screen can lead to less Battery consumption that leads for longer Battery Life.

This can be done by using a small window program “Le Dimmer”.

This program is of 80 kb in size and do not require to even install it.

By this program, everything behind the active window you are seeing will be dimmed. It looks like watching a movie in the theatre. 

Now follow these simple steps to do all this.

  • First download the “ Le dimmer ” program by googling it or you can even download it directly by clicking HERE.
  • You will download a zip file. Extract it. You will get 2 files in a folder ' ledimmer.exe' and 'readme.Txt'.
  • Run the Ledimmer.exe
  • You have done it.
    • just click “Ctrl+Shift+q” or

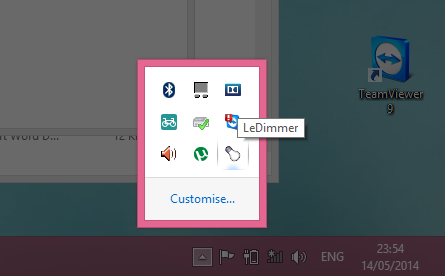
    • alternatively as shown in the figure, you can see the option of Le Dimmer in the TaskBar Menu. Right Click on it and select “Quit” to close the Le Dimmer.
If you like our post, Subscribe to this site by click on "Join to this site" below the comments
For more such posts and tricks, connect with us on Facebook.

Sunday 11 May 2014

Making Different smileys on Facebook

You have seen many times people using various emoticons in Facebook Comments..

Here are some of the Emoticons with their respective codes.

Enter any of the code and press enter you will get the emoticon shown besides it..


    Emoticons        Code        Meaning of that Emoticon    
:)
Happy
:(
Sad
:P
Tongue
:D
Grin
:O
Gasp
;)
Wink
B|
Sun-Glasses
>:(
Grumpy
:/
Unsure
:'(
Cry
3:)
Devil
O:)
Angel
:*
Kiss
<3
Heart
^_^
Kiki
-_-
Squint
o.O
Confused
>:O Upset
:v Pacman
:3 Curly Lips
:|] Robot
:putnam: Face of the Boy
(^^^) Shark
<(") Penguin
(y) Like

Use your emoticons in the comments..!!

If you like our post, Subscribe to this site by click on "Join to this site" below the comments
For more such posts and tricks, connect with us on Facebook.

How to Add Text Boxes in Microsoft Word 2007?

It is very easy to use the feature of text boxes in Microsoft Word 2007 and above. You are able to place as well as manage text boxes wherever you want in a document. You can also format the text boxes with borders, shading etc using the different tools available. 

There are numerous tools given providing different options for size, colour, style etc for text boxes in Microsoft Word 2007 and above. 

Follow these simple steps to add and format text boxes in Microsoft Word:

  • Click on the Insert tab.
  • Choose the Text Box option.
  • There are two ways you can add text boxes in Microsoft Word
  • You can choose from the given formats in a scroll-down list or you can choose the option of drawing your own text box.
  • You can see the option of Draw Text Box at the bottom. Click on it if you want to draw your own box.


  • You have to click and then drag the mouse to the place you want to add the text box.
  • It is also very easy to resize it by using the same technique of clicking and dragging.
  • Now you can format the text box from the Format tab which will appear after you draw your text box.
  • You can select the style of the text box, add shadow as well as 3-D effects, resize and arrange your textbox from the tool bar.
  • Change the shape by clicking on the following button and selecting the desired shape from the list. The border of the text box can also be changed.
  • If you want to further format the text box, right click on its border and select Format Text Box option.
  • You can choose different tabs and control the advanced settings of your text box. When you are finished with your settings, click on the Ok button.
  • You can add text boxes in order to enhance a certain part of the document used for business or educational purpose. They can also prove helpful in highlighting text in documents prepared for presentations.

If you like our post, Subscribe to this site by click on "Join to this site" below the comments
For more such posts and tricks, connect with us on Facebook.

Saturday 10 May 2014

POWERCMD: Alternative to Command Prompt..

Every body is aware of Command Prompt Box (CMD) in windows. People need to use it frequently for various purposes like executing a program with root excess, to start or stop various functions on their devce and many more..

After so many upgrades of OS, still the default command prompt utility is not much improved but having very basic features. There is no Option of copy/paste in Default Command Prompt. The other main Flaw in the Default Command Prompt is that if you mistakenly close the CMD, all your data is lost and now you have no data of what you typed..!!

If you want a better alternative for default command prompt utility in Windows then PowerCMD is much better option.
You can download it from here.

PowerCMD is a featured rich command prompt alternative for Windows operating system which is available for free. It will change the way you look at the command prompt feature or utility in Windows.

Advance Features of PowerCMD Command Prompt 

  • You can configure command prompt background, font, enable/disable word wrap, transparency, view/hide line numbers
  • You can have multiple CMD screen on the same window (MAX. 4) by splitting it and you can perform different operations on each screen and can even copy the command from one screen to another..


  • While moving between the directories, entering the first word only shows all the folder in that folder and can be reached to destination folder very easily
  • You can copy/paste option (which i think is must required)
  • No loss of work as have auto save logs to save the history in log, so if you accidentaly closed the prompt then too just open the logs and you can view all the commands that you entered previously
If you like our post, Subscribe to this site by click on "Join to this site" below the comments
For more such posts and tricks, connect with us on Facebook.

Fun with Print Screen Option..!!

Here’s a small trick to play a prank to you friend and to make them confuse about the problem with their computer or a laptop....

You know the use of Print screen button on the keyboard (PrtSc).

It captures the screen, right ?

But now I will tell you how to use it for some fun.

  • Take screen shot of the desktop by pressing Print Screen on the desktop. 
  • Go to Paint and paste it (Ctrl+v). 
  • Save it (Ctrl+s) 

Now follow the steps to hide Desktop Icons and Auto Hide Taskbar..!!

  • On the desktop right click -----> arrange icons by ----> De-select 'Show Desktop Icons '. 
  • Now right click the taskbar and select properties . 
  • Check auto hide the taskbar. Click OK.

Now change your wallpaper and keep the Screen Shot that you saved earlier.

  • If paint is not closed, select File ---------> 'Set as background (Centered) '. 
  • Else go to the location where you saved the screenshot ------> Right Click on it and select "Set as Desktop Background" 

Now on the desktop even if you click any icon nothing will happen !!!

Now do I need to tell you how you can use it for fun on someone else's PC ?

To revert back to normalcy---->

Change the wallpaper and select 'show desktop icons' on the right click menu and again de-select the option of “Automatically Hide the Task Bar”.

HAVE FUN....!!!!
ENJOY....!!!!

If you like our post, Subscribe to this site by click on "Join to this site" below the comments
For more such posts and tricks, connect with us on Facebook.